If you’re new to WordPress, you may wonder how to create a new blog post. The process is actually quite simple and only requires a few steps.
You can even schedule them in advance so that your blog always has fresh content.
In this article, we’ll show you how to create a new blog post in WordPress. We’ll also share some tips on how to make sure that your blog posts are high-quality and engaging.
How to Create a New Blog Post on WordPress
- Log in to WordPress Dashboard
- Add a new post
- Add content
- Add featured image
- Publish the post
Step 1: Log in to WordPress Dashboard
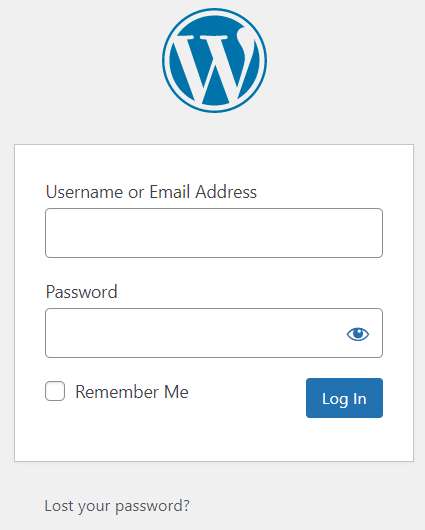
Like charity begins at home— creating a new blog post begins on the WordPress dashboard. First, log in to your WordPress admin area and make sure you have permission to add a new post.
Unless you are already logged in to the WordPress dashboard, you can simply visit yourwebsite.com/wp-admin and enter credentials to get the admin area.
How can I be sure that I have permission to create a new post?
As long as you have the minimum administration level such as Author, you can create or delete posts on WordPress. The more advanced permission you have, the more things you can do.
Pretty simple, huh?
Step 2: Add a New Post
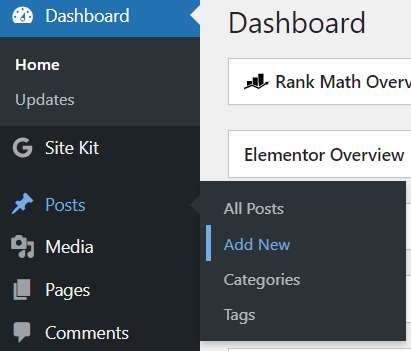
Adding a new post on WordPress is not that hard. When you are on the dashboard of the WordPress admin area, you can see a lot of options. You just need to find Posts.
Hover your mouse pointer on Posts, you will see the following options—
- All Posts: You can check all of your posts from here — no matter whether they are published, drafted, or in review section.
- Add New: You can create a new blog post in WordPress by clicking it.
- Categories: Categories are defined as the most general method of grouping content on a WordPress site.
- Tags: You can add tags to group your content based on similarity.
As we have come here to learn how we can create a new blog post, let’s focus on that.
Click on Add New.
Step 3: Add Content
Whenever you click Add New, you’ll get a blank canvas to put your content.
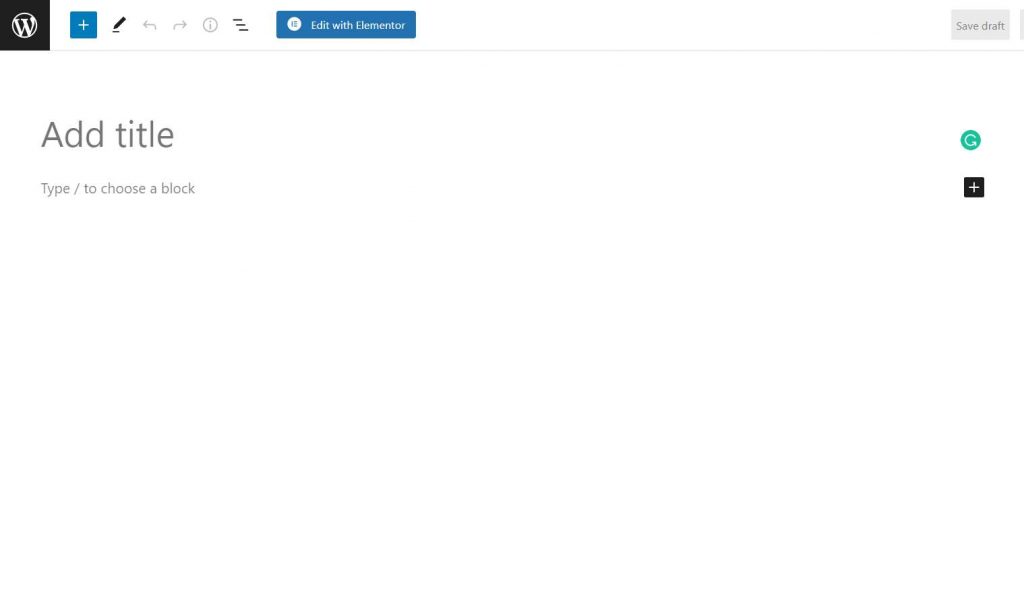
Simply, write or paste the title of your blog on Add title.

But before you start inserting content, make sure you have a stable internatet connection or save your work often by clicking on Save Draft button on the upper-right corner.
Now, it’s time to add content beneath the title.
You can either write content there or paste your previously formatted content on the blank area.
Uploading Images
As WordPress block editor works just like a bunch of blocks, all the paragraphs, images, and headings are separated as blocks.
Uploading image is easy-peasy.
To upload an image, click the “+” button from the right most side. Select the “Image” block.

You can either upload image from your computer, or choose image from the Media Library, or insert from URL.

Booya!
Once you insert the image, it’ll look like the following:
You can Replace image, Ass caption, Change image size, and add Alt text as per your needs.
Add Links
Inserting link to other blog or website is an important SEO ranking factor. Whether you are planning to insert Internal or External links, adding them on your content is very easy.
All you need is just to select the text/s where you want to add links.
Click on the link icon or simply press Ctrl+K.
You’re in! Insert the link on the blank area and press enter. You can also set whether you want your link to be opened in new tab or not.
#Step 4: Add Featured Image
Though you can publish your post without any images, featured image is one of the most important elements of a blog post in terms of SEO and user interaction.
Adding featured image is as simple as adding text on WordPress.
You just need to click on Post from the upper right side and scroll down until you find featured image section.
You can select your featured image by clicking on it.
Done.
#Step 5: Publish the Post
Now, we have come to the end of our tutorial on how to create a new blog post in WordPress. If you follow us to the end, assuming that you have already uploaded the content with images and links.
Let’s publish the post so that our visitors can please their eyes.
Publishing post is easy. You just need to select “Publish” in the top right corner of the page.
You can either publish the post immediately or schedule the post for the later date.
Unless you want to hide your post from your visitors, you can set the Visibility to Public.
Final Words
We hope that you now know how to create a new blog post in WordPress. As long as you want to interact with users or sharing your thoughts to your visitors or increasing the search engine ranking, publishing blog posts will always get the highest priority.
If you have any other questions regarding WordPress, please read our other blogs.
